Sunday, November 26, 2017

DIY Burlap Wreath

Hola!

This is one of my favorite, quick and easy DIY projects...a burlap wreath. It takes little effort but is such a big statement piece for your front door. Enjoy!


XOXO,
Tasha

Monday, December 12, 2016

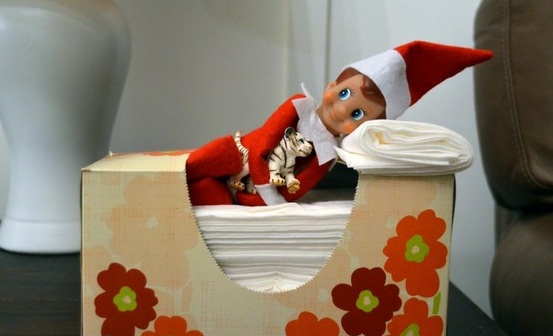
Elf on the Shelf Ideas

Hola!

I know Christmas is getting closer and it's probably becoming more challenging trying to figure out what to do with that darn Elf! While we don't have one in our home, I enjoy seeing pictures of the great ideas other people have come up with. I have rounded up a few photos (thanks to a friend and google :) that can hopefully get you out of your Elf funk!

 Elf enjoying a bubble bath!

Who doesn't like a day at the beach? 

 "I need a snack, I'll just finish these."

 Hey, does this train go to New York?

 "Looks like you need an oil change and a new alternator"

 Sack race!

 Netflix and chill lol

 He wants to feel like a member of the crew!

 Oh, I'm just hanging around!

 Thanks for the help wrapping the gifts Elf!

 Being an Elf is a tough job #spaday

 Nap time!

 Elf doing his chores!

 Busted!

 #Frozen

Just trying to stay fit and trim!

Hope these help to wrap up your next couple of weeks with Mr. Elf!

Laters, 
Tasha

Vlog & DIY Christmas Treats

Happy Monday Folks!

For today's video we take a stab at the vlogging world! Yay! This was something different for us but I wanted to make these Christmas treats I heard of and saw on Pinterest called Christmas crack. Pinterest Fail or Success???? You'll have to watch the video to find out. Hope you enjoy tagging along with us to Target and back home to make these treats! Enjoy!


Laters, 
Tasha

Monday, October 10, 2016

DIY: 100% Satin Hair Bonnet

Hello Beautiful!

Today I bring you a tutorial for something every woman should have in her hair stash. A satin bonnet!! Now, I'm not talking about one of those $2.99 bonnets you get from Walmart or your local beauty supply store. No judgement if that's your preference but have you ever really felt the fabric on those? Many times the outside is soft and silky and the inside........well, not so much. For many of us, especially those with natural hair, we struggle with keeping our hair soft and moisturized. Who wants to spend $10-$20 on hair products only to have it soaked into your bonnet or your pillowcase and not in your hair?? Not I!


I recently lost misplaced my satin bonnet that I've had for years and I figured this was the perfect time to whip out my sewing machine and make my own. *Disclaimer: I am by no means a professional sewer, not even an amateur, so if I can get this done anyone can.* So I went to Joanns and picked out some fabric, which wasn't a very big selection at all. If you choose to tackle this project, make sure you look at the label on the fabric spool and it says charmeuse satin.


Materials:

Charmeuse satin fabric (1 yard)
Scissors
Measuring tape
Disappearing fabric ink
Pins
1" elastic
Sewing machine or needle and matching thread

Saturday, May 2, 2015

Teacher Appreciation Gift Ideas

It's that time of year again....teacher appreciation week! Show the great teacher's in your life some love! No matter how big or small, I'm sure they will be thankful. Here are some ideas...

"Mani" thanks to you and all you do!
You can make this as big or small as your would like.  Some ideas include nail clipper, nail file, polish, cotton balls, nail polish remover, etc or even a gift card to a local nail salon. Get creative! *I plan to do this one for my kiddos teachers*


Gift Card- Visa, Restaurant, Fast Food, Starbucks, Mall, Massage, etc!

Move night
Treat your teacher to a gift card to the local movie theater or as another option you buy a Redbox gift card and attach it to a box of popcorn for them to enjoy at home :). Check out this neat idea here!


Homemade or store bought treats

Straw Tumblers- Attach a note for a personalized touch


Homemade card- If you have a lot of teachers to buy for, it can get kind of expensive so you can always get crafty and have your kids make cards for them. You can be as creative as you want and it's a special touch since it was made by your child :).

Crayon Initial Frame
I thought this was super cute and if your house is anything like mine, you have lots of broken crayons laying around. Just use a frame and a piece of cardboard wrapped in school paper to make more sturdy *no need to use the glass*. Frames can be pricey depending on which you choose, remember you can always try your local thrift store and then spray paint the frame a different color if you want. They can hang this up at home or at school!


Flowers
You can have your child bring them to school or have them delivered. If you want to go a step further you can have your child bring one flower every day with a little note attached and by the end of the week she will have a little bouquet of flowers. Again you can help with the cost by using fake flowers or a vase from the thrift or dollar store. Usually your local grocery store has pretty flowers that are inexpensive. 

Basket of Treats
Buy a basket as big or small as you like and fill with treats! Soda, water, juice, candy, granola bars, chips, fruit, cookies, etc. Teachers work long hours and get very little time to eat so give them some things to snack on to get them through the day. Add a gift tag and a bow if you wanna get fancy!


These are just a few ideas, there are a ton of ideas online to check out if you need inspiration!

Thanks to all of the teachers out there!!!

XOXO, 
~ Tasha

Monday, January 19, 2015

DIY: Leg Warmers

Winter is in full swing which means it's all about the skinny jeans and boots for the ladies!! I absolutely love a skinny jean and boot combo, I hope this trend never dies. With the right combo it can make any outfit look really put together with very little effort. 

But as with everything, it's nice to add a little something to this outfit and near the end of last season I fell in love with pairing leg warmers with this combo. So I shopped around in stores and online to see where I could find some at a decent price. Well, I found a few online but I was nervous they would be too thick to pair with my boots. So here comes another DIY project and all you need is an old sweater and a pair of scissors. Don't have an old sweater, head to your local thrift store and find one :).  Here is my thrift store sweater that I got for $1!


To make your DIY leg warmers all you need to do it cut off the sleeves of the sweater. Make sure to pick a sweater that has really stretchy sleeves since they will be going over your legs now and instead of your arms.


You do not have to use the entire sleeve, it just depends on how long you want your leg warmers to be. When you have decided on your length, just cut them! I did no measuring and I cut them a little bit lower than the elbow.


When you decide to wear them just slide the sleeve onto your leg with the unfinished edge at the bottom so it's tucked in your shoes so no one will see it. If you want to get fancy, you can  add lace, buttons, rhinestones, etc.


Simple as that! Easy Peasy! 

I love how it looks and you can add a pop of color to any outfit!


Give it a try!

~Tasha

Tuesday, November 4, 2014

DIY Fall Trend: Jeweled Collar Shirt

I'm coming at ya with another easy DIY project that happens to be big in fashion this Fall! I'm not an expert fashionista but I like to stay on trend while putting my own touch on things also. I ran across this picture a few days ago of Tamara, 1/2 of my favorite 90's show Sister Sister! 

Other than the fact that she is beautiful in this picture, her jeweled collar shirt caught my eye. I absolutely love it!!!

So of course I figured I could make this myself with things I already have at home. I searched my closet for a collar shirt and found this white one. 

Of course you can use whatever color you like but I used white so I could pair it with lots of other colors. And if you don't have a collar shirt you can always hit up your local thrift store, I always find a ton in there :). I used a relaxed fit cotton polo shirt to have a more laid back look but if you have a button down collar shirt that you want to use that's fine as well. 

I already had studs and rhinestones at home from a previous project so I pulled those out and started playing with different designs. But if you don't have any, head to your local craft store and check the clearance section first! But here is the design I came up with...


And here is the final product!

I cut the sleeves off of my shirt simply so it wouldn't be so much bulk under other shirts. I tried it on with sweaters, a blazer and just a plain cotton shirt and it added a little jazz to each item!
Don't be afraid to mix with patterns along with solids!!


I really love how this turned out and it will inspire me to purchase more crew neck shirts and sweaters. But what I'm most excited about is this cost me $0.00!! Sometimes it pays to hang on to things :). 

What do you think?

Monday, August 25, 2014

DIY: T-Shirt Headband

Hola!

Nope, no baby yet so here is another quick DIY project for ya!

I love a good headband, it just puts a little spice and fun in your outfit when you don't want to do too much but look really put together. I came across this picture on FaceBook...
and it came at the perfect time because I just got a stain on a t-shirt I couldn't get out so I had one to try for this project. 


I followed the picture and cut six strips from the shirt. I know it only needs five to complete but I wanted the extra to tie off the ends. 

I simply stretched the strips by pulling on them to make them thinner and longer.

I tied off one end to get started and followed the picture exactly as described. However, after I got to step 12 and it didn't tell me which step to start at to repeat the process I got a little confused.  So I found my own technique and kinda winged it!
With my technique I just kept alternating the strip in the middle. So in step 1 above I have my middle piece that I just brought over from the far right. Next in step 2, I took the strip from the far left and overlapped it with the two pieces next to it to now make it the "new" middle piece. Lastly, I took the far right piece and overlapped it with the two pieces next to it so this strip is now the middle piece. To finish the headband, I just kept repeating these steps until I got to the end and used the other half of the extra strip I cut to tie off the finished end.
Here is the final product and I like it. Now, because it's made out of a t-shirt it means that it's really stretchy and the braided look can get really distorted if you pull it too much. So I just pulled it slightly and used the extra strip I tied the ends off with to make a bow in the back. I did braid my hair in anticipation for labor and delivery (c'mon baby!!!) so these are the best pics I could get. I don't really like the look with my braids, but I know it would be perfect to wear with my natural hair in a puff or a twist out!  Give it a try, it literally took me about 10-15 mins from start to finish.


Friday, August 1, 2014

DIY Dresser Remix

Sooooooo, I know I said we weren't using a dresser this time in the nursey buttttttttt, I changed my mind and found a great deal on Craigslist. I was able to get this for $30!
No, it wasn't pretty but I knew I could work with it. I initially wanted it all white with pink knobs on the bottom two drawers and some cute decorative ones at the top. Well, the white didn't work out as well as I wanted it to because the green areas were just too dark to cover and I didn't want to prime it first. Hey, I'm almost 9 months pregnant, the less work, the better! Plus the light color made the slight imperfections more noticeable which I did not like.

So I had to go to plan B and went to Lowes to pick up just a sample container of Valspar paint (love Valspar paint!) in Emerald Isle. I still used the white for the sides and the trim and the green just on the drawers. 

Now y'all know how I feel about pairing pink and green together (OO-OOP Soror's lol). But I sprayed painted the knobs before painting it because I thought the drawers would be white. Well as I said above, that didn't work out as planned but I still liked the pink knobs and it was one less thing I had to buy so I kept them. But for the two at the top I went to Hobby Lobby and got something a little nicer. Although the green was not in my original plan, I actually really like how it came out.


I want to add a lamp on top of the dresser also and maybe a vase of flowers but I will figure that out later. The knobs I found at Hobby Lobby were actually perfect, they are little owls that match her bedding. 


The picture on top of the dresser is something Amaya drew a few weeks ago. She said it was a picture of Khloe when she gets 4 years old...lol!

The frame was actually an ugly oak color that I got from Kmart on clearance for $2. Well I had points with their Shop Your Way Rewards program so it was FREE and when I got home I just spray painted it pink :). 

In total I got the dresser for $30, two sample containers of Valspar paint (white and green) $6 total, owl knobs $2.50 each and $2 for the frame (which didn't technically come out of my wallet). So this project was completed for just over $40 total and I love it! The dresser is the perfect size for the room and adds another pop of color to the space. 

Have you done any DIY projects lately? Let me know below!

Wednesday, July 30, 2014

Nursery- Time is Winding Up!

I'm going into the 35th week of my pregnancy this week which means only about 5 weeks left!! Eeeeekkkkk! I'm ready but then I'm not ready lol! But as I get her room ready, pull out all the baby stuff and wash her clothes, it's really starting to hit me. I'm going to have 2, yes TWO kids!!! I know it's not like 5, but I've only had one child for almost 5 years so I would be lying if I said I wasn't nervous. 

Anywho, let's get to the point of this post, her room! We are converting the majority of our office/guest room into her bedroom. We still needed to keep a small desk in the room because I do complete half of my work from home. So we have a small corner "office" now and the rest is her room. 

The crib is the same we used with our other daughter so we didn't have to purchase that. But we purchase a small swing and a changing table off Craigslist when I was about 4 months along for only $20 for both! Couldn't beat that deal! And instead of getting a dresser for now (to be addressed in another post very soon), my Mom purchased us some cube storage containers to use under the changing table to store her clothes along with the closet of course. 

Here is the crib and the bedding for her room. I found her bedding set while out of town working in Kentucky at Target a couple months ago. It was regularly priced at $80 and was marked down to $22! It was not the bedding I wanted but I couldn't pass up a 4 piece set for under $25.  I was also able to score the breathable bumper at Target as well for $8.50 with a pricing error on their part, which is regularly priced at $30!

So, I couldn't convince my husband to paint the room this time around so I tried to get creative to add some color to walls. I bought the curtains off amazon for like $6.50 for both. I wanted to do something different in terms of the curtain rod so I thought using tree limbs would be unique plus it would bring some texture to the wall and they were FREE!

I saw this...
online months ago and just loved the monogram on the wall. So I tried to recreate this look in my own way while staying on a budget :). 

I printed everything on my printer at home and just mixed and matched the patterns to my liking. I think it turned out really cute. I only had to spend $3 on frames from the Dollar Tree! Here is a closer look of the letters. 


I tried pulling the colors and patterns from the bedding set to bring it all together and I think I did a pretty good job *pats self on back*.  Hubby isn't completely in love with the "curtain rods" or the monogram but I think it will grow on him, plus me and Amaya like it, so he was out voted. Haha!

Although she probably won't sleep in her own room until she is a few months old, I'm happy that it's all together. My baby shower is this weekend so as soon as I get all of that stuff put away and get my hospital bag ready, I will be set for her arrival! I can't wait to kiss her little face!!!